Designing an Open Closet for a Kids’ Room
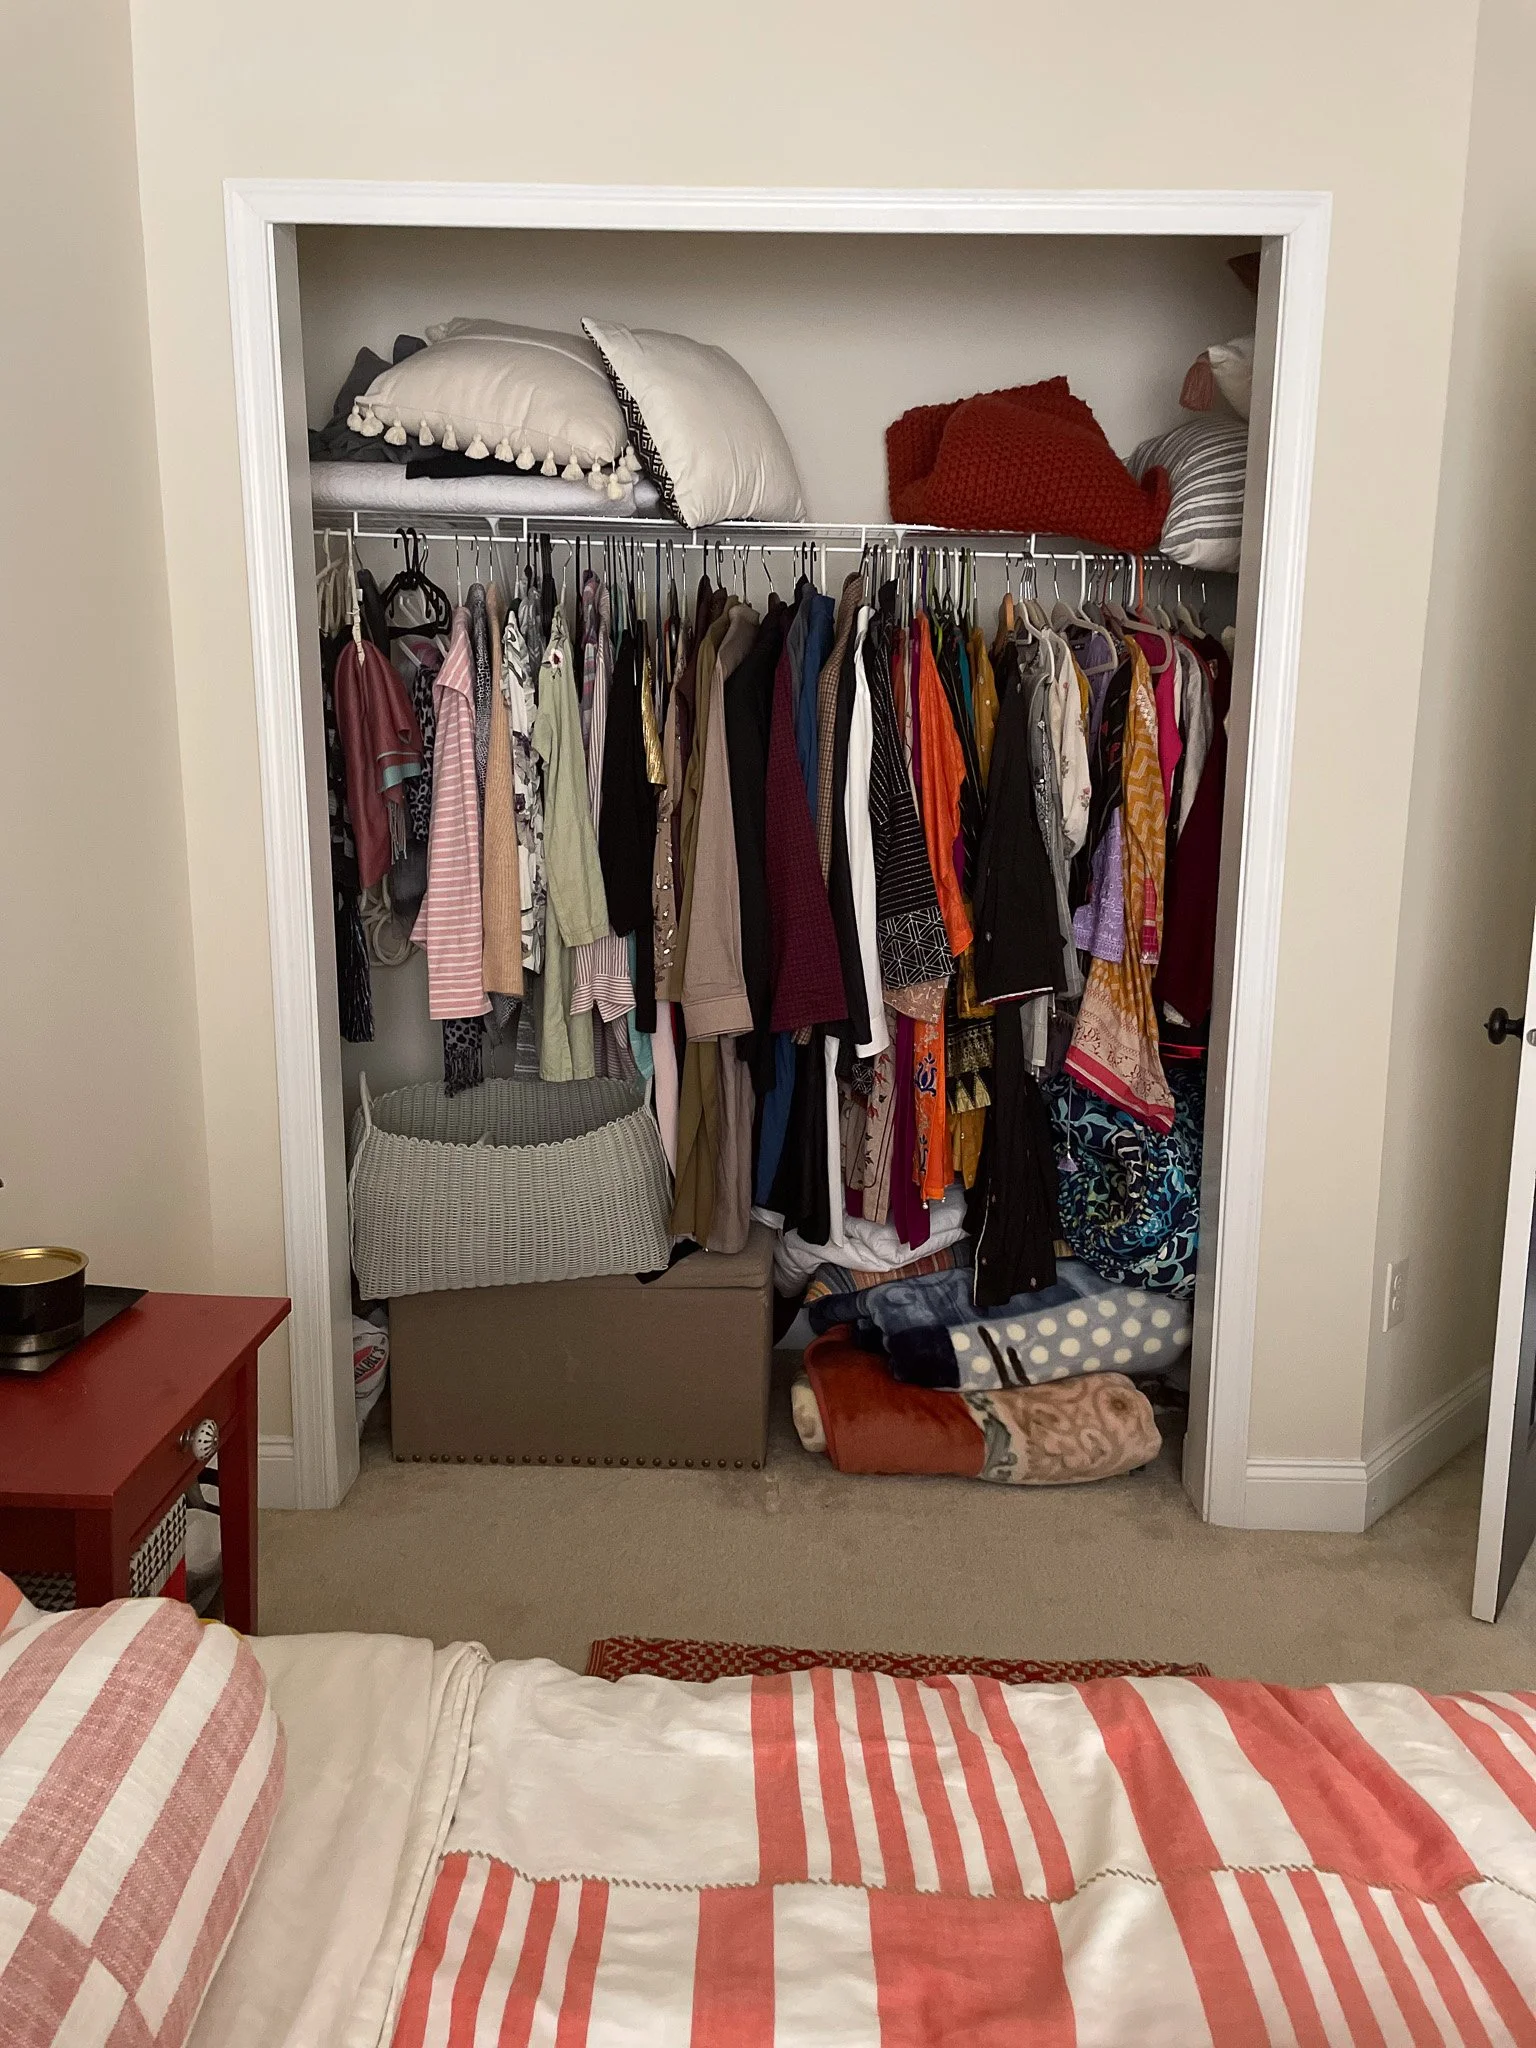
When we decided to turn our guest room into our daughter’s bedroom, one of the very first projects we tackled was the closet. The goal wasn’t just storage, it was to create something open, beautiful, and functional, designed to grow with her over time.
Instead of hiding everything behind doors, we intentionally removed them and treated the closet like part of the room itself. That decision shaped every design choice that followed.
Step 1: Start With a Clean Slate
Before adding anything new, we:
Removed the existing closet doors
Took out all old hardware and hanging rods
Cleared the space completely
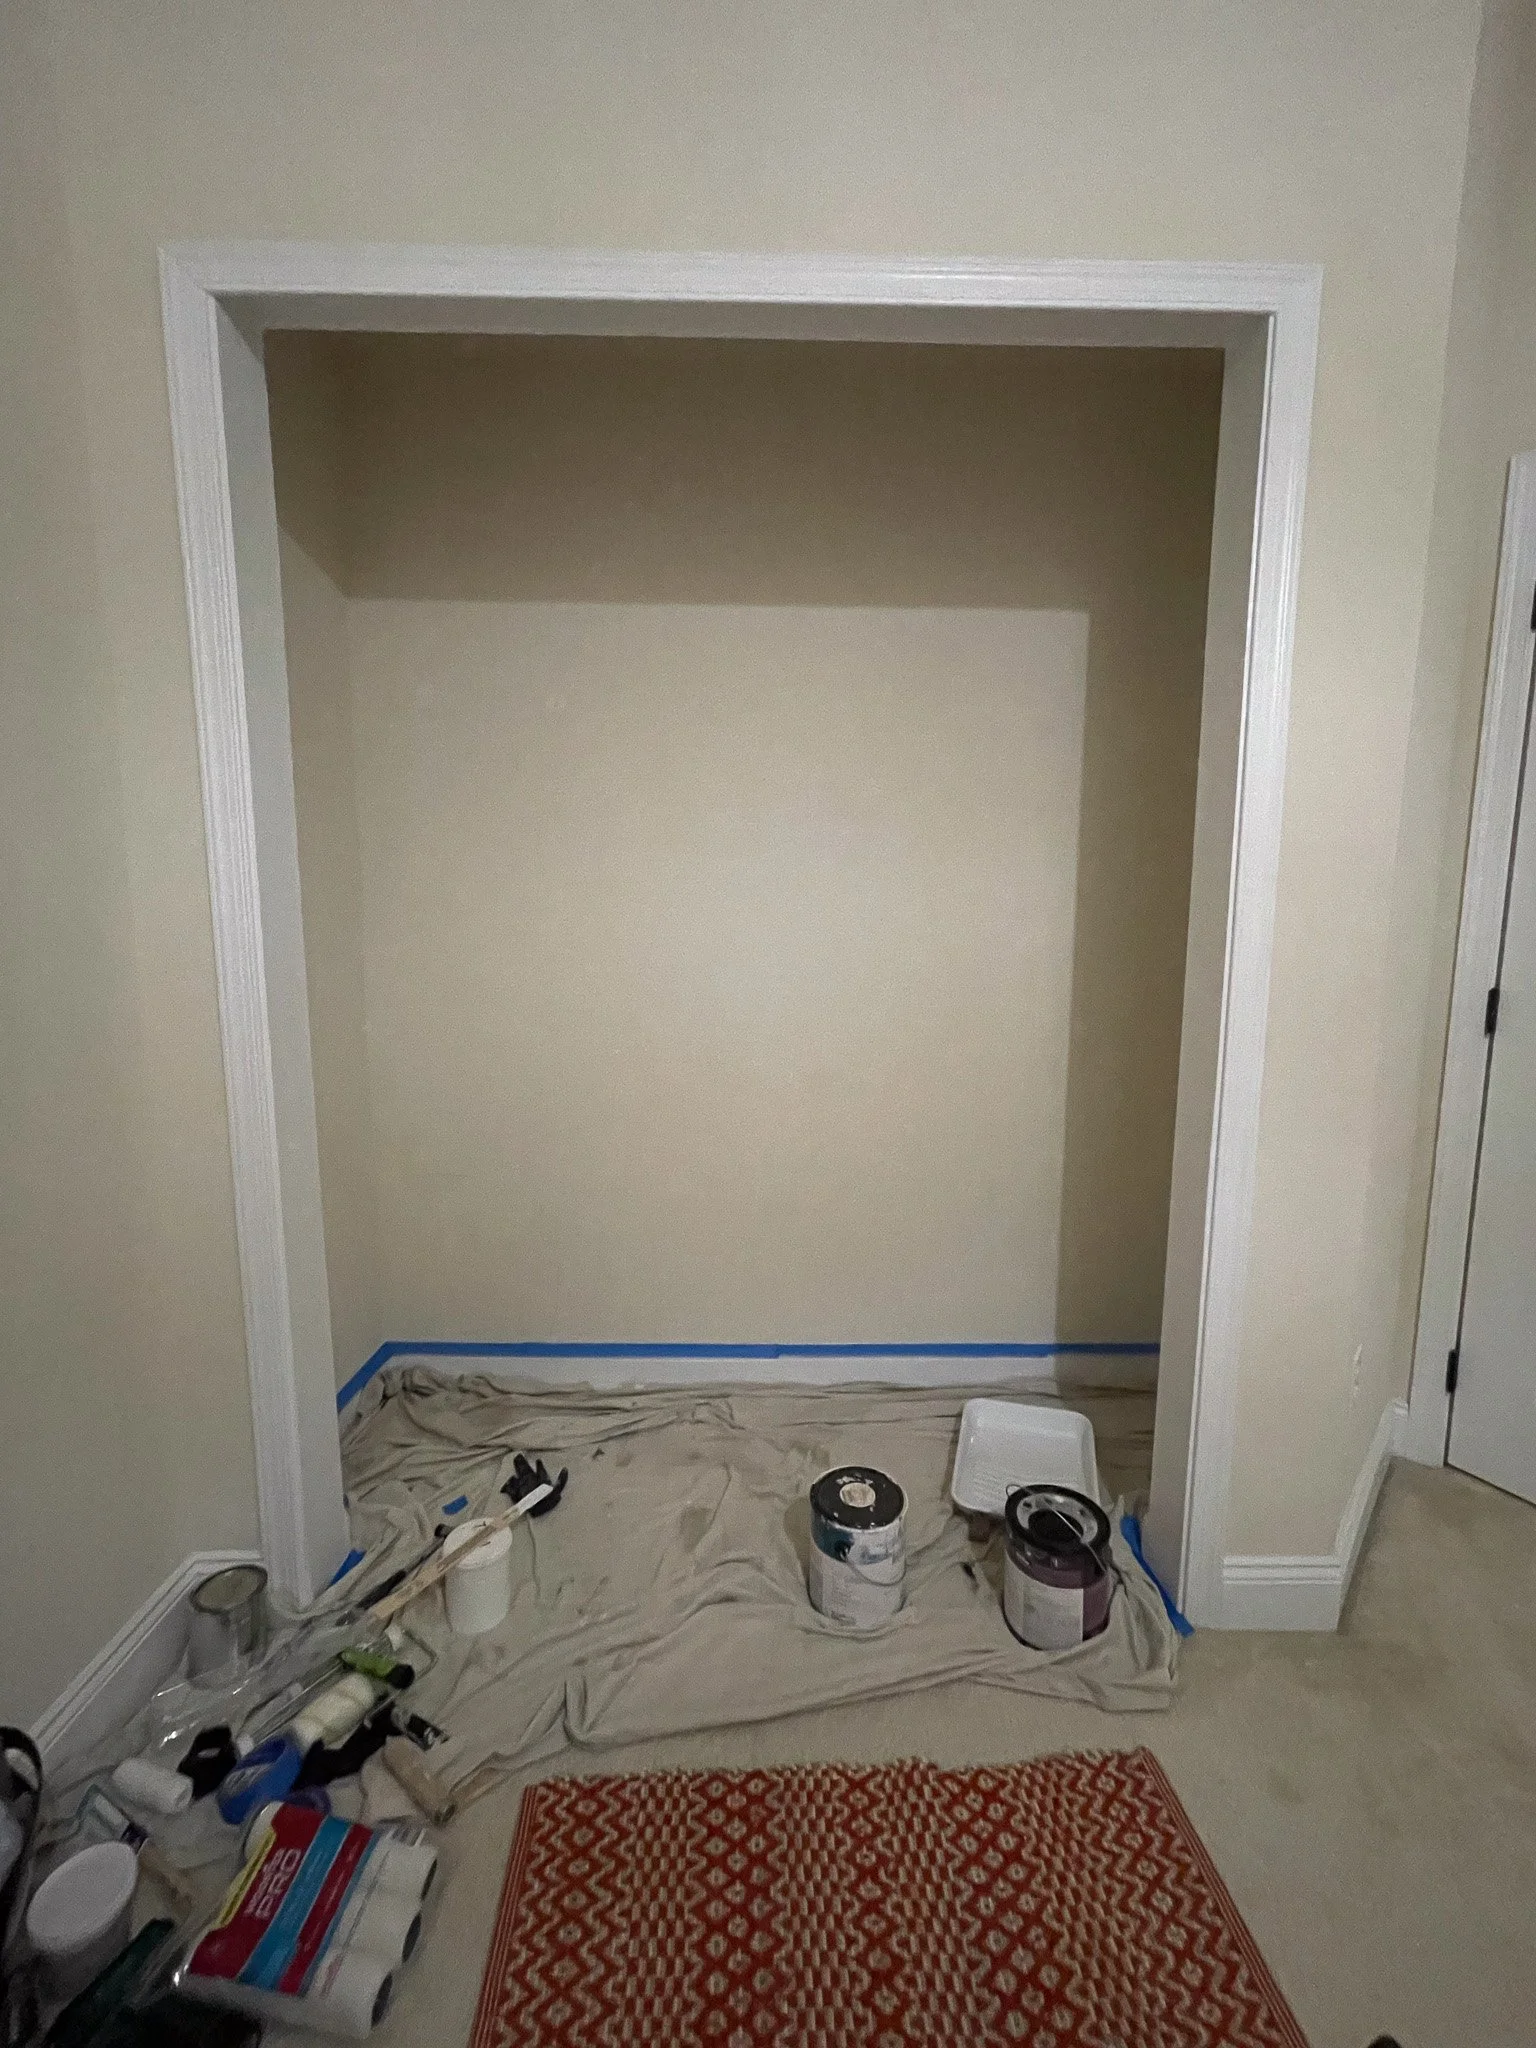
Empty closet with doors and hardware removed, creating a clean slate before installing an open shelving system
This step matters more than people think. Starting fresh allows you to reimagine how the space can actually work, especially when designing for a child whose needs will change.
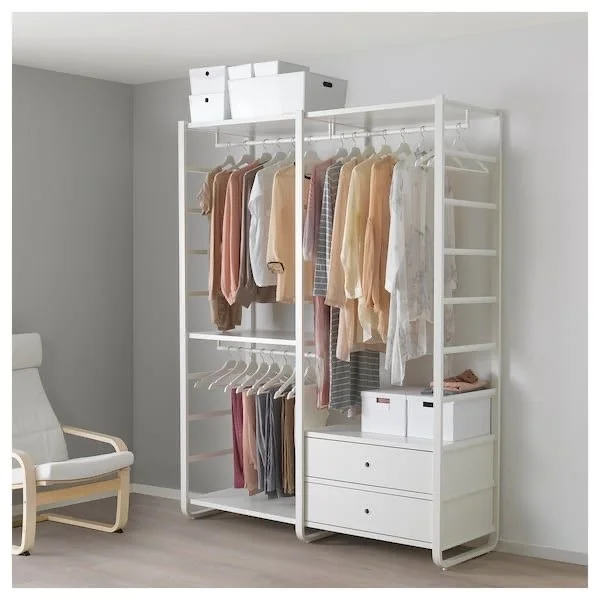
Step 2: Choose an Open Closet System That Can Grow
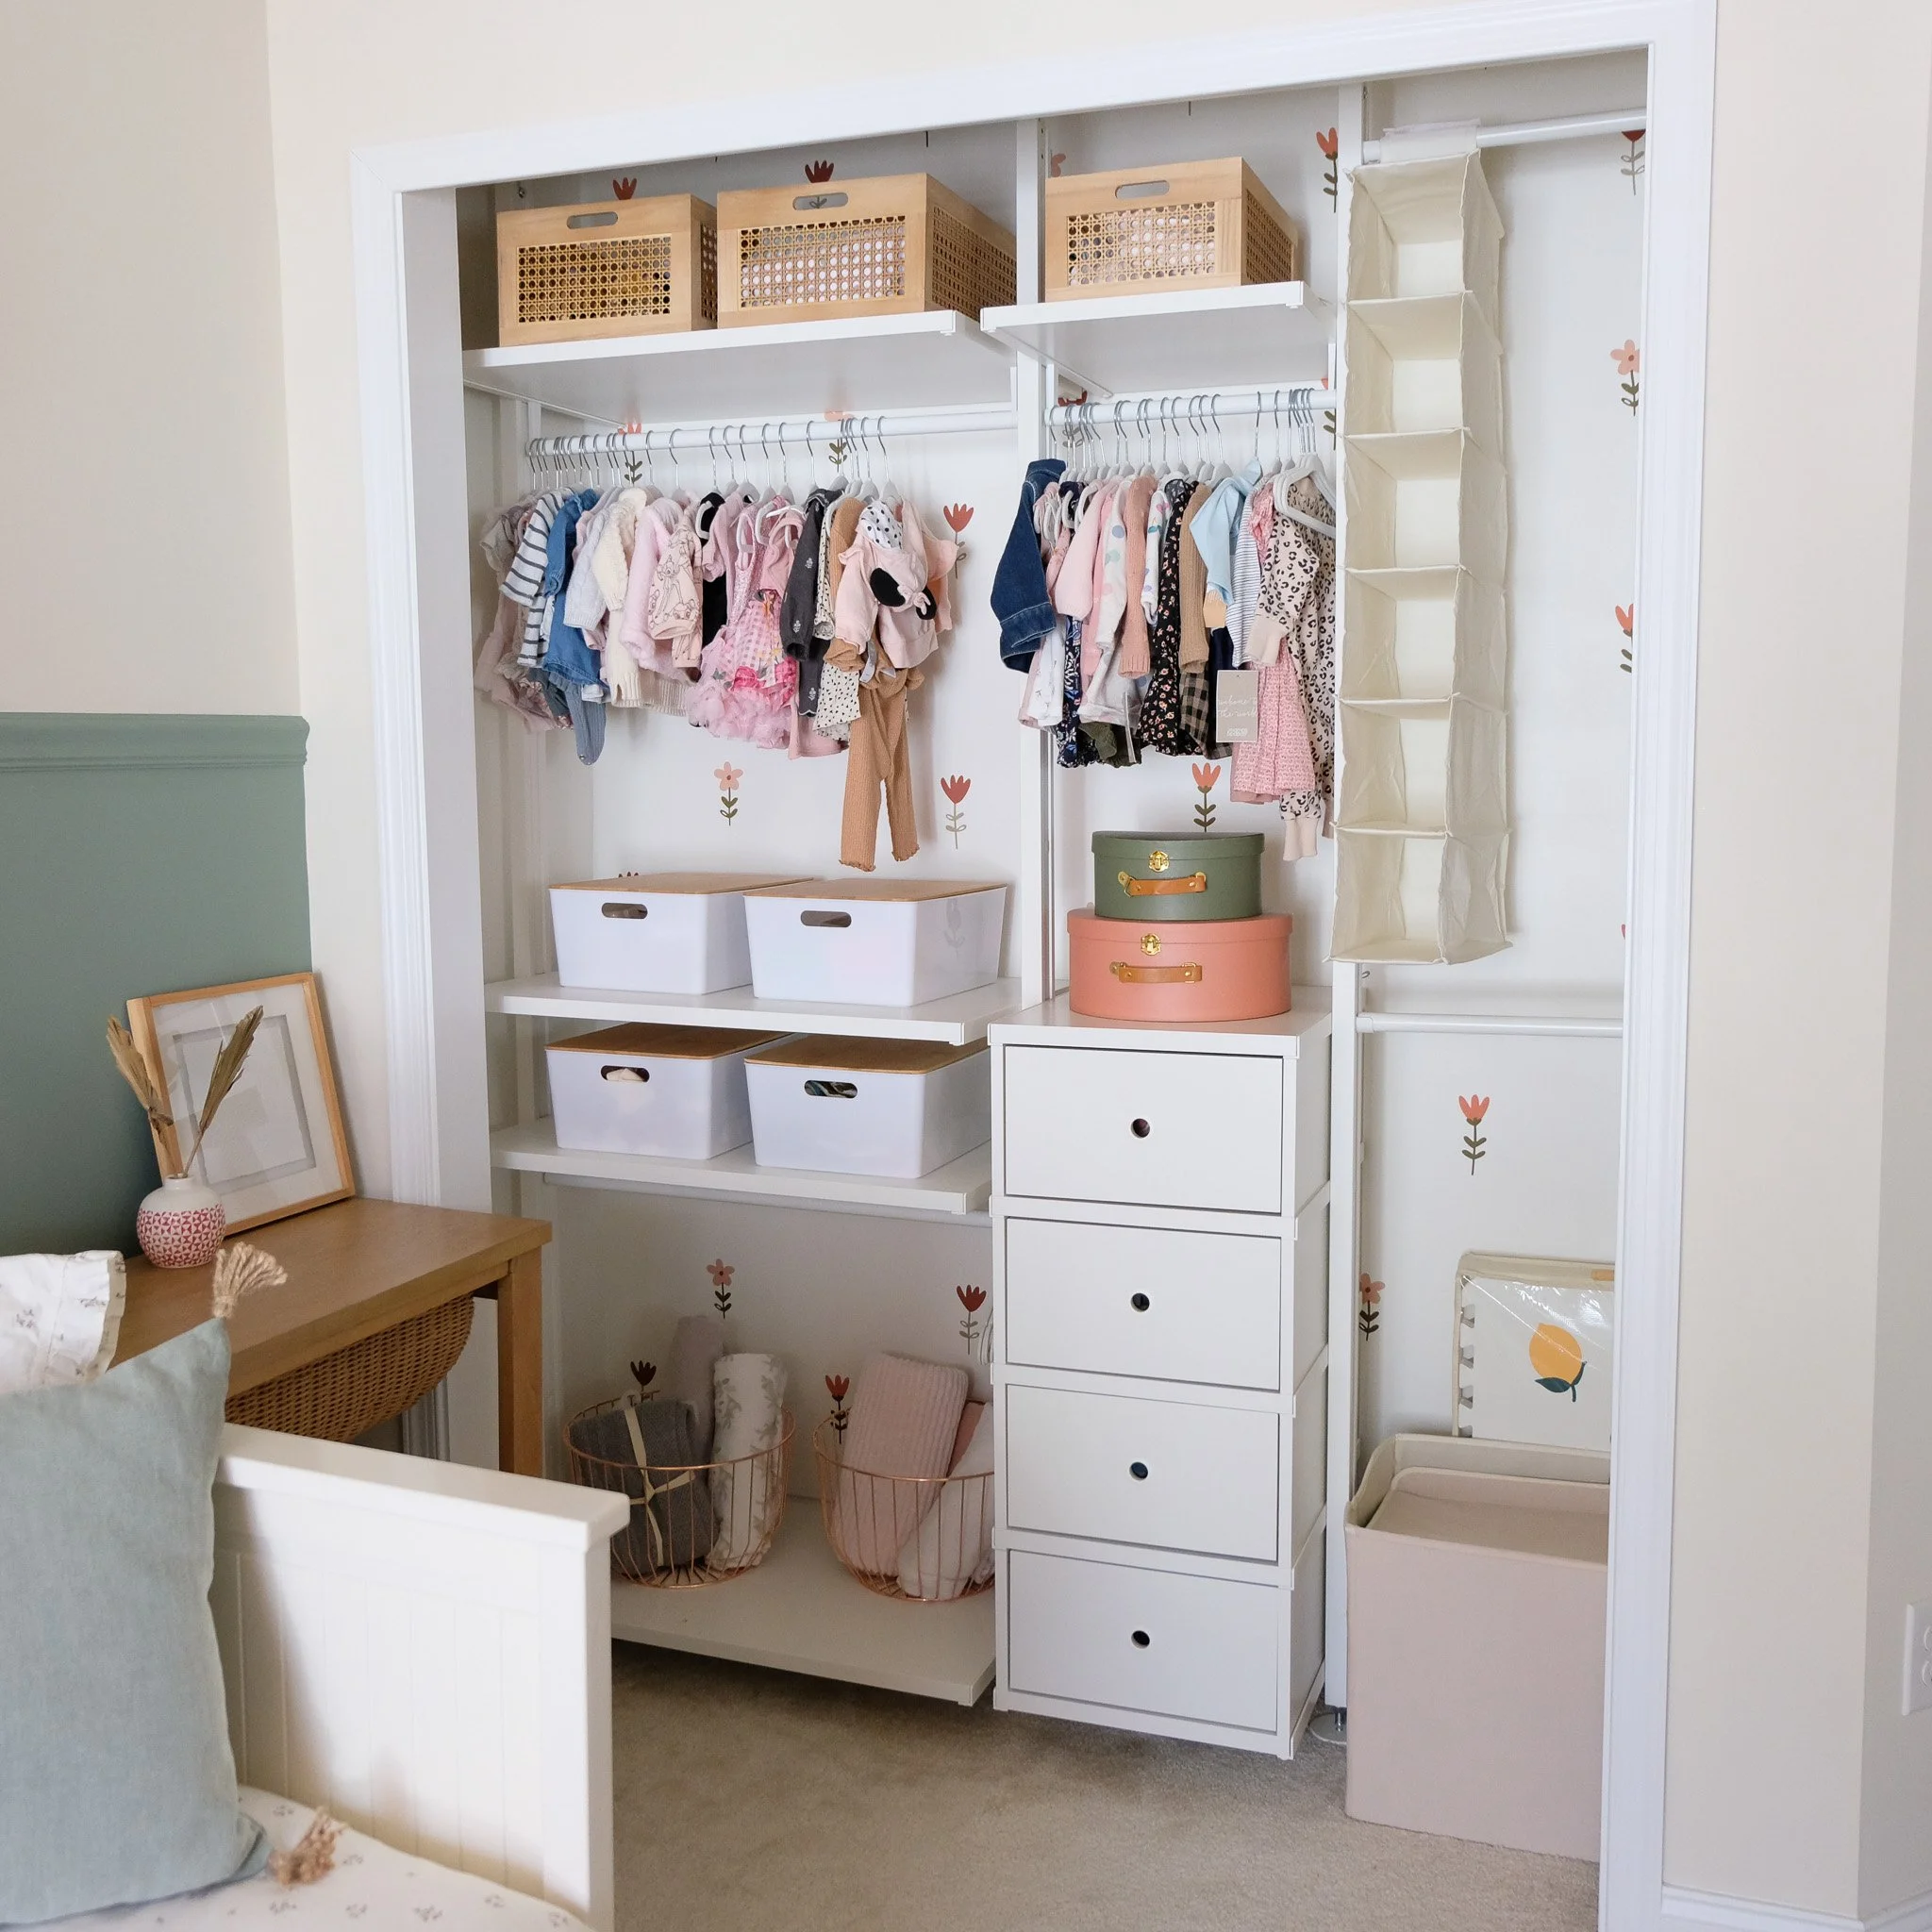
We customized and installed the IKEA ELVARLI shelving-based closet system, which gave us flexibility without a custom-closet price tag.
Why this worked so well:
Adjustable shelves as clothing needs change
A mix of hanging + folded storage
Clean, minimal look that blends into the room
💡 Design tip: Before installing, think through how the closet will actually be used, how many hanging items vs folded clothes, shoe storage, and space for accessories.

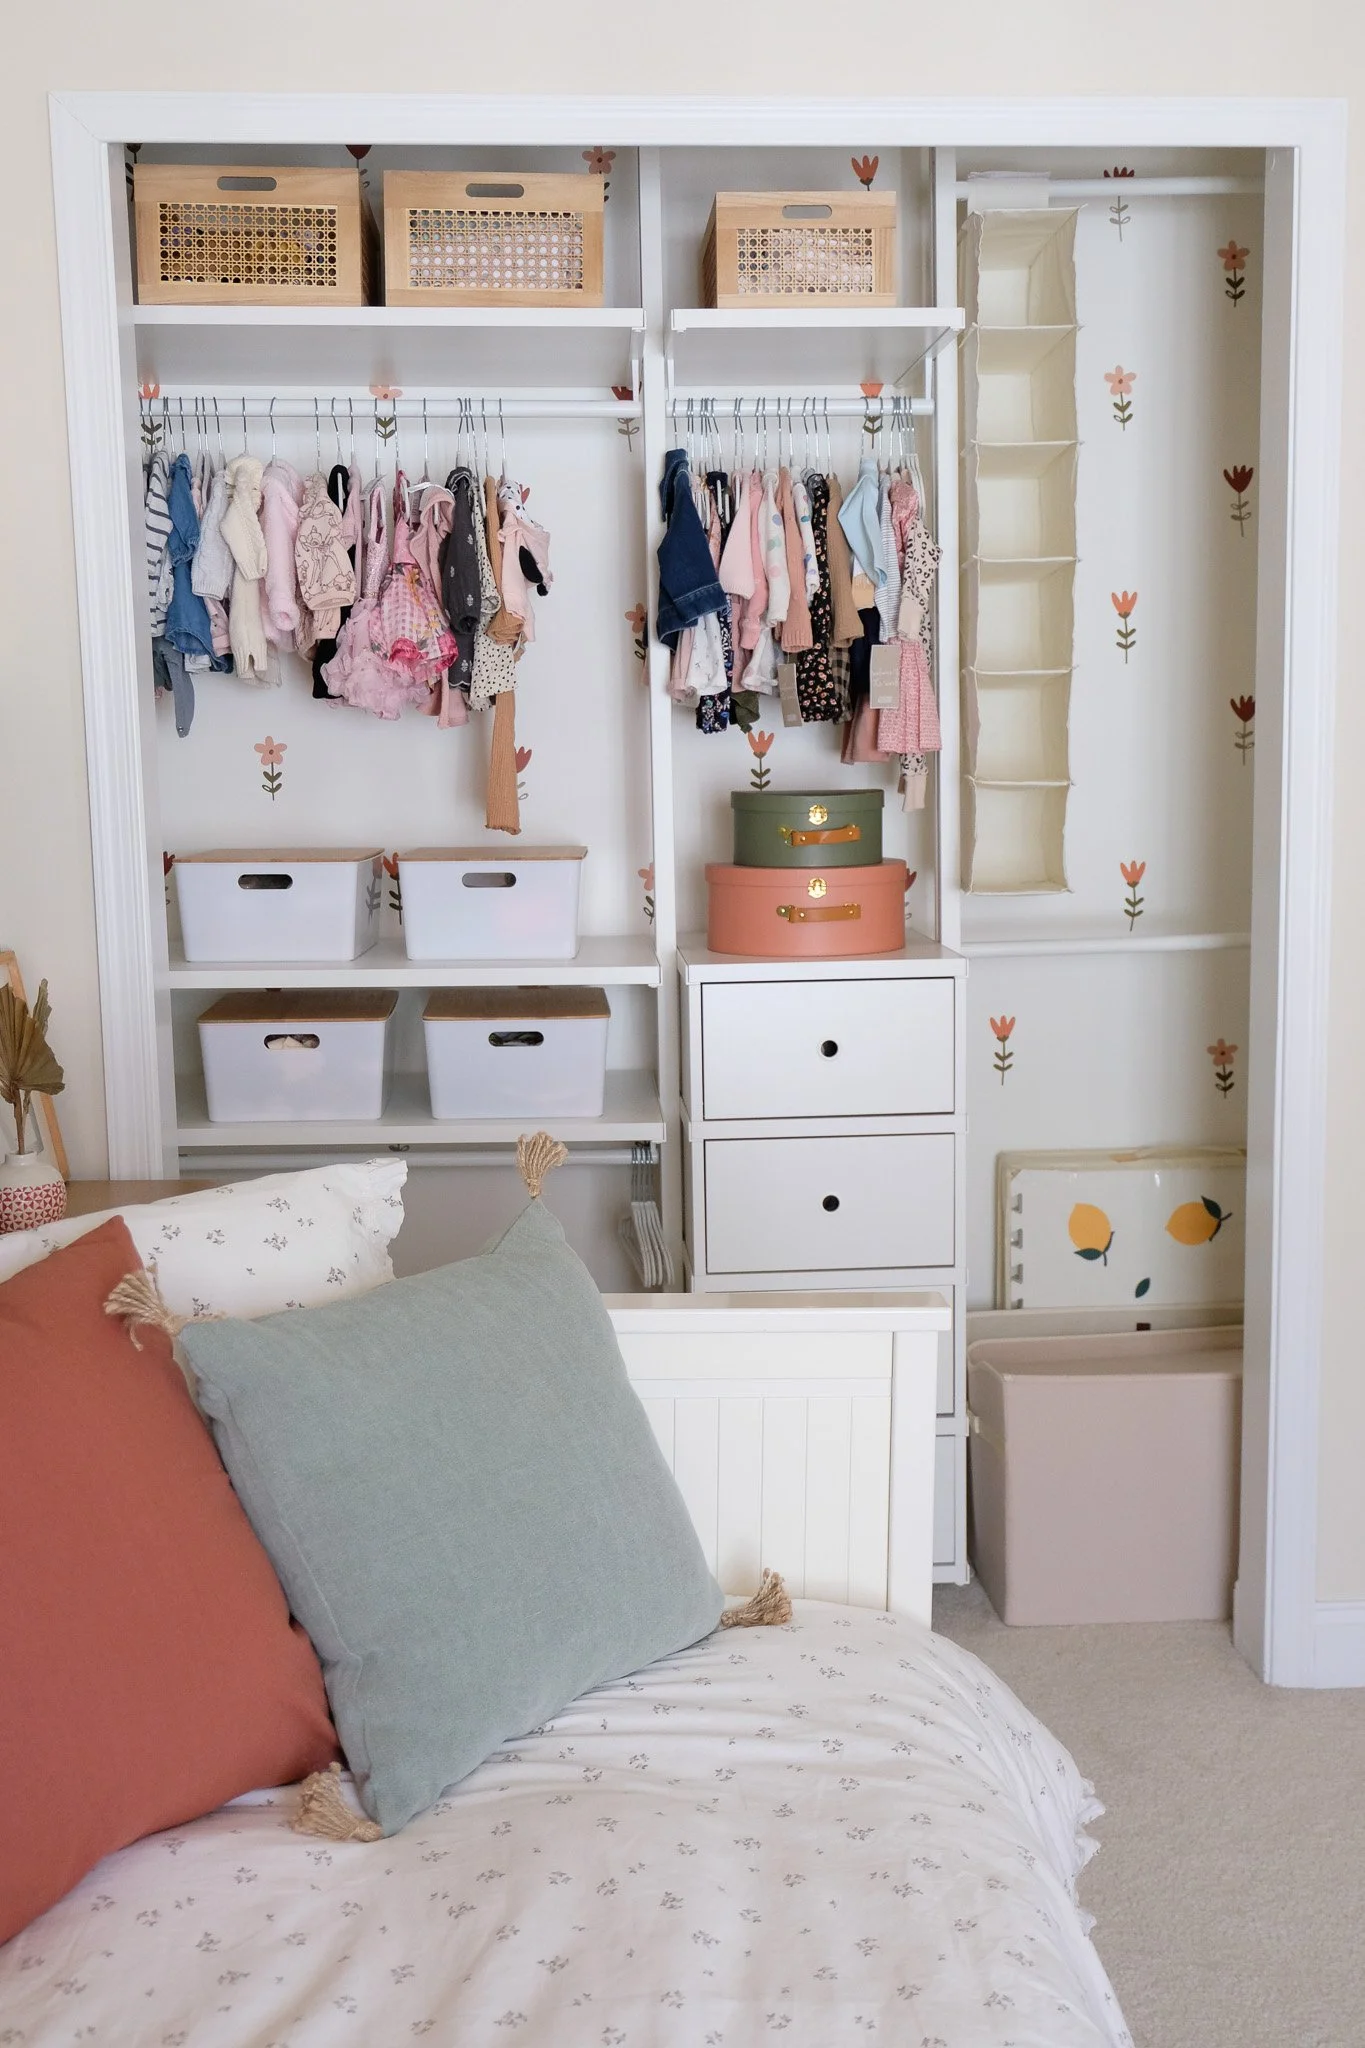
Step 3: Paint + Pattern Instead of Wallpaper (Budget-Friendly Win)
Because the closet would be open and always visible, we wanted it to feel intentional, but didn’t want to invest in wallpaper for this particular project.
Instead:
We painted the inside of the closet to match the room’s color palette
Added floral wall decals that complemented the overall theme
The decals were sourced from Etsy, and they were:
Cost-effective
Easy to install
Easy to remove or update later
✨ This is a great alternative if you want visual interest without the commitment (or cost) of wallpaper.
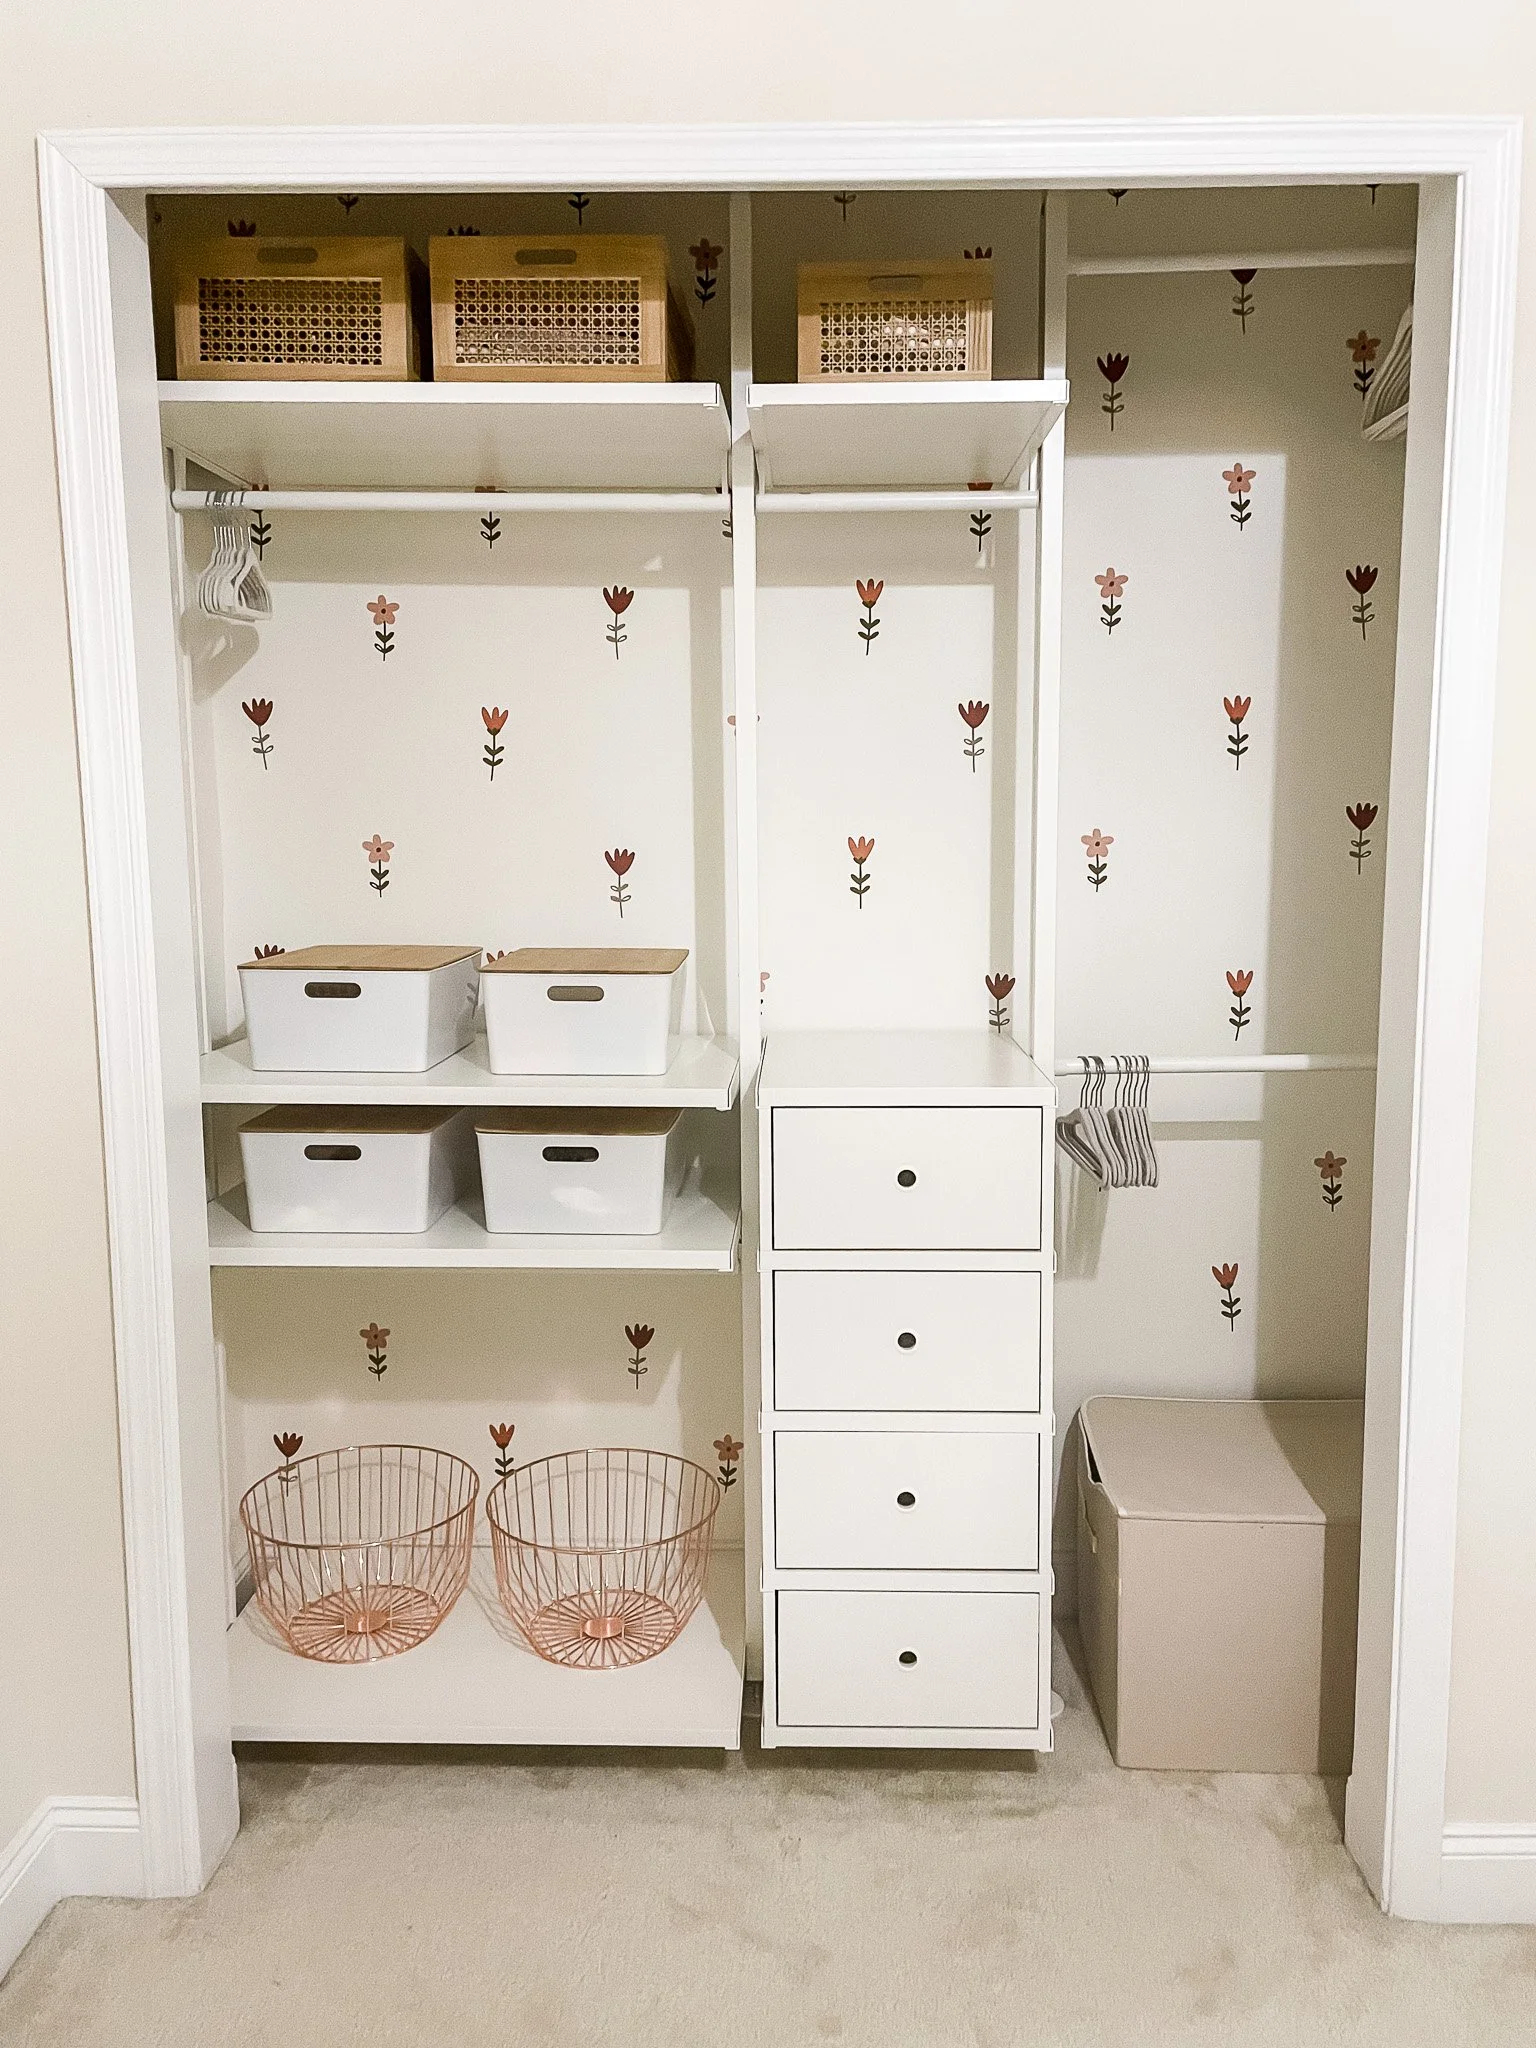
Open closet in progress featuring an IKEA shelving system and floral wall decals, combining functional storage with a cost-effective decorative accent.
Step 4: Make Open Storage Feel Elevated
With no doors, styling matters.
A few simple choices made a big difference:
Matching hangers (this alone makes a closet look intentional)
Coordinated baskets for accessories and folded items
Neutral bins and containers to reduce visual clutter
Open closets work best when you limit visual noise and stick to a cohesive color story.
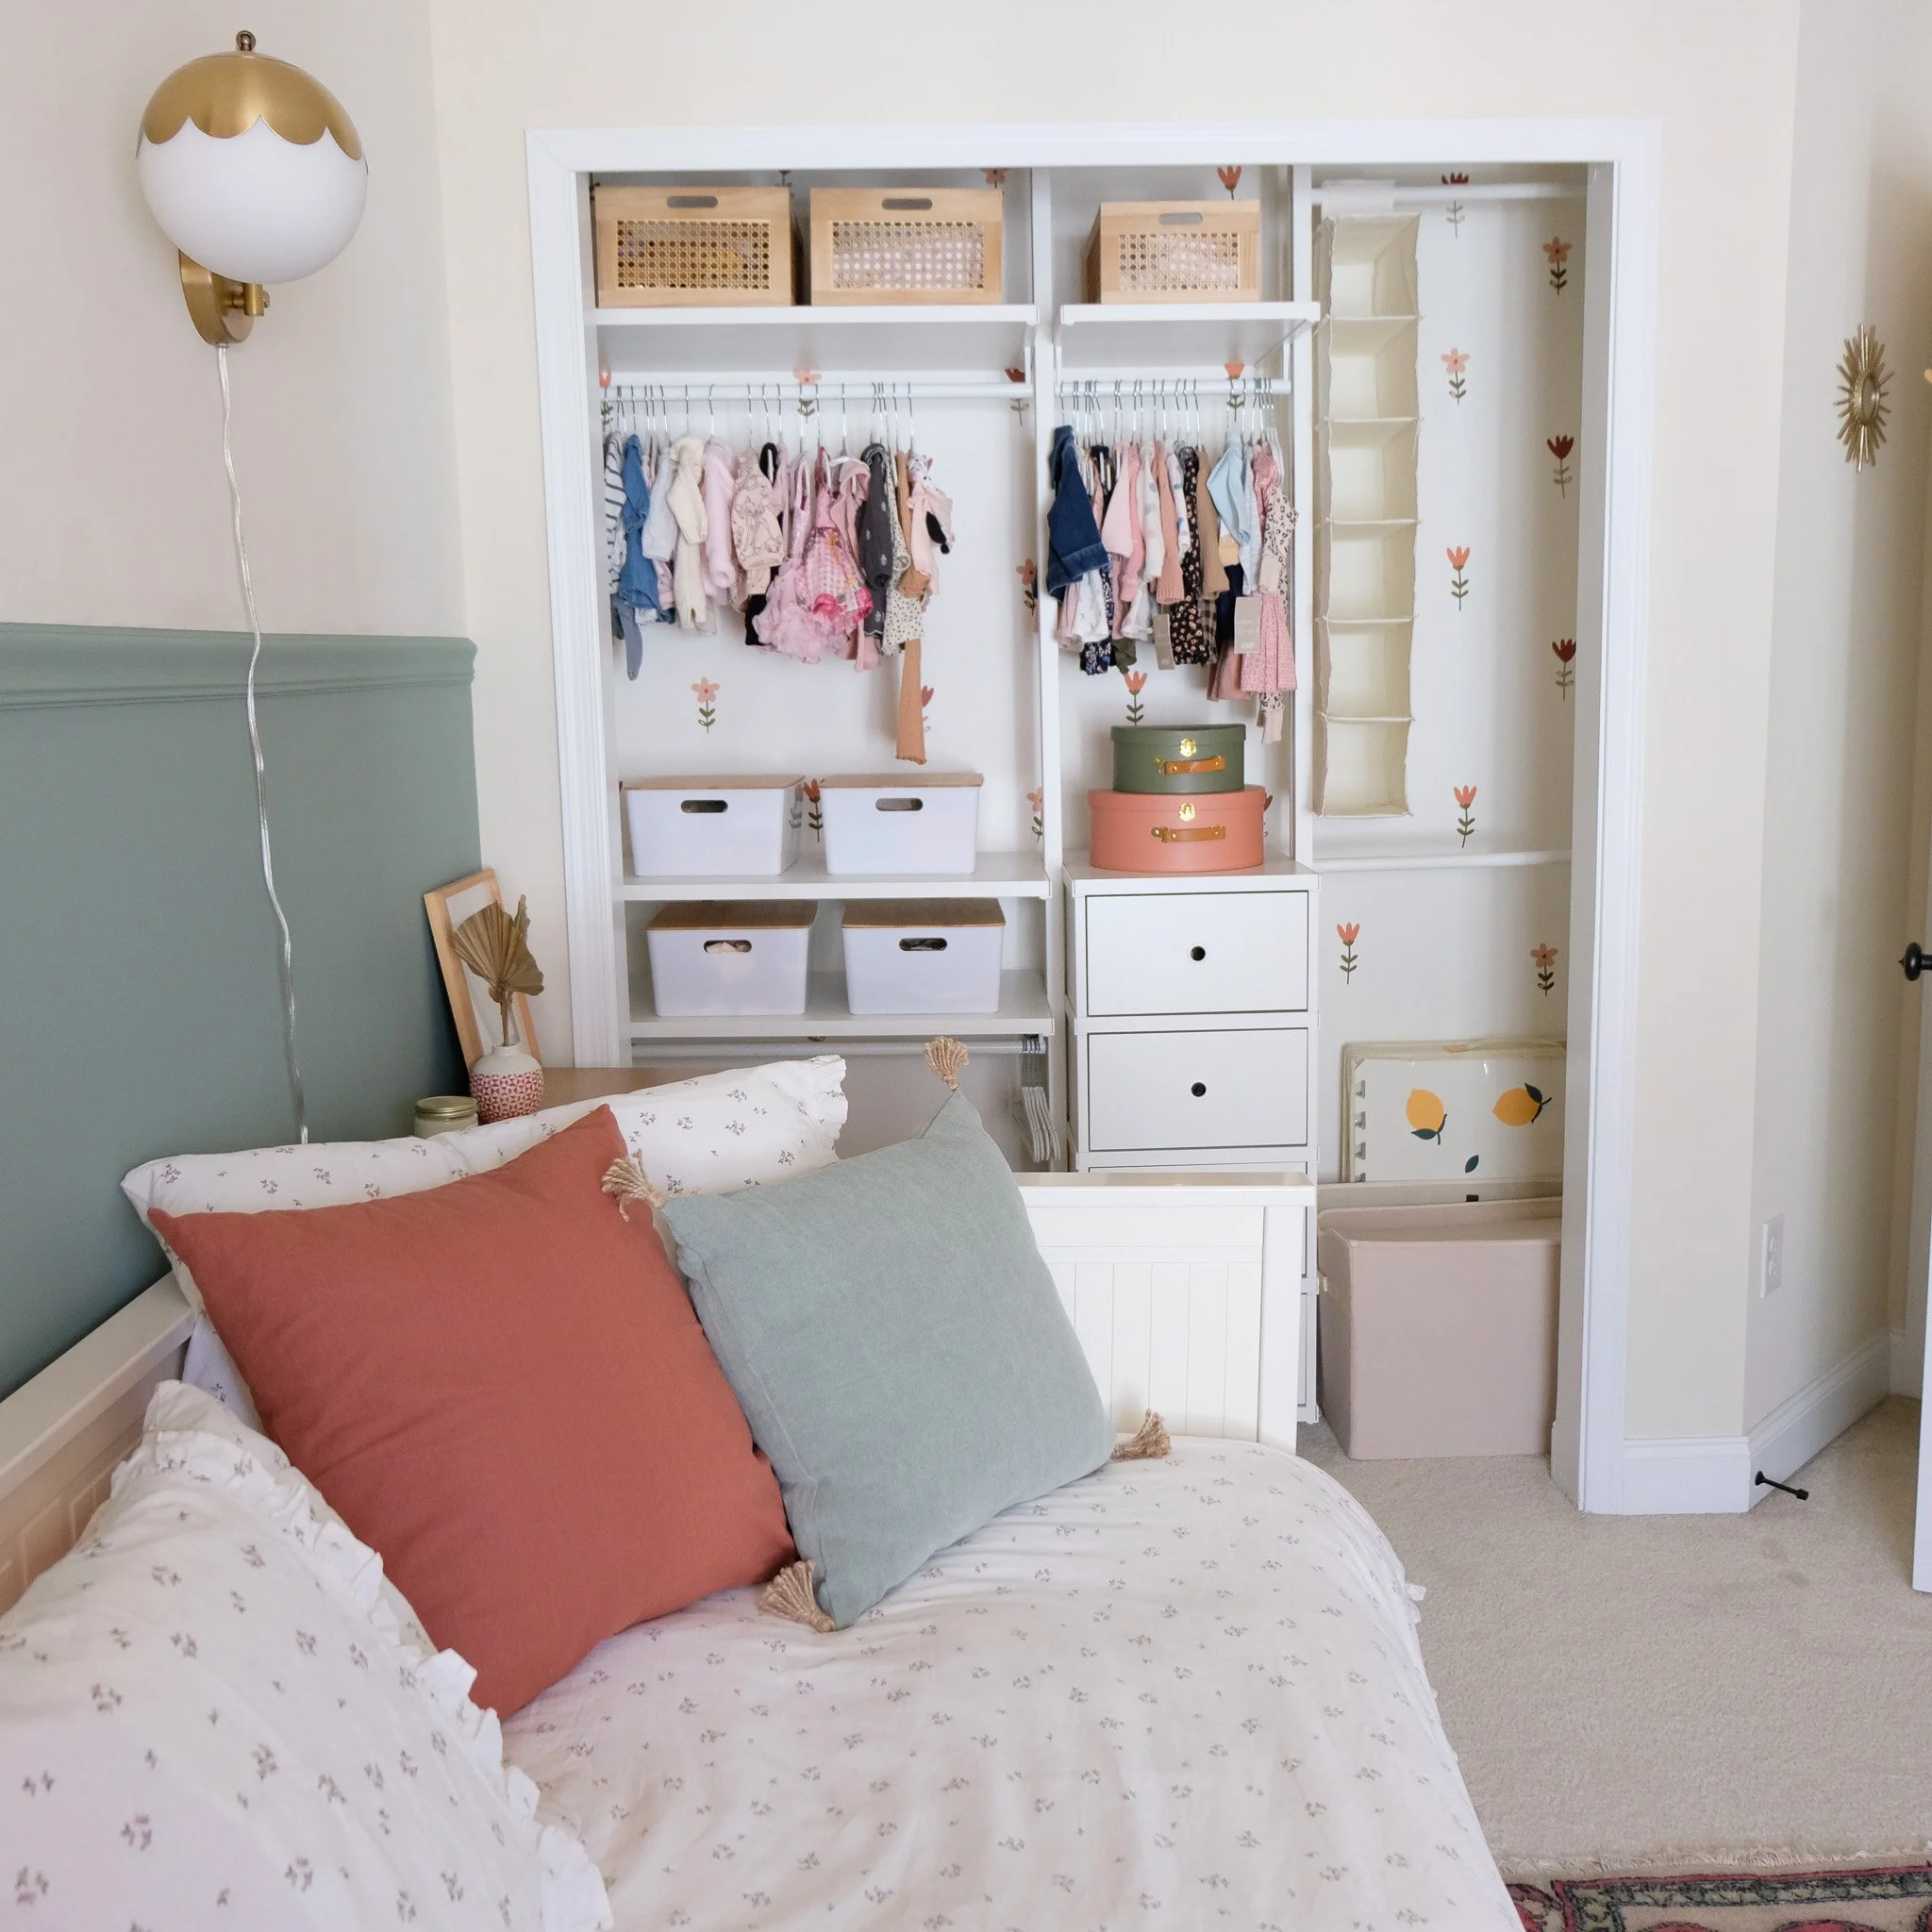
Finished open closet styled with coordinated hangers, neatly arranged clothing, and integrated shelving, creating a functional and visually cohesive kids’ room storage solution.
Step 5: Design for Longevity, Not Just Today
One of the best parts of this project? We’ve had this closet for years, and our child has truly grown into it.
Because the system is flexible:
Shelves can be adjusted
Storage can evolve
The space still feels relevant and functional
Designing with longevity in mind saves money and frustration down the line.
Why We Love an Open Closet for Kids’ Rooms
An open closet:
Encourages organization
Makes daily routines easier
Turns storage into part of the room’s design
When done thoughtfully, it doesn’t feel messy, it feels intentional.
This closet transformation wasn’t about perfection, it was about function, flexibility, and beauty. By removing doors, using an affordable closet system, and adding thoughtful details like paint, decals, and cohesive storage, we created a space that works beautifully for our family.
Sometimes the most impactful changes are also the most practical.