
How to Measure a Room for Interior Design: Your eDesign Floor Plan Guide
Affiliate disclosure: none needed — no affiliate links are used in this post.
If you're working with an interior designer online, one question comes up more than almost any other: how do you actually measure a room for interior design, and what does your designer need from you to get started? Whether you're brand new to eDesign or you've hired a designer before and want to do it better this time, here's what makes the process smooth on both ends, plus a step-by-step guide to drawing a floor plan your designer can actually use.
What Makes a Good eDesign Client
eDesign works best when you're proactive and decisive. You're doing some of the legwork that an in-person designer would normally handle themselves, like measuring your space and photographing it, so the process moves as fast as you do. A few things that make a real difference:
Come with inspiration already gathered. Pinterest boards, saved Instagram posts, magazine tears, whatever it is. It's much easier for a designer to interpret “more of this, less of that” than to start from a blank page.
Be honest about budget up front. A designer can't right-size a plan for a budget they don't know. Vague answers here usually mean more revisions later.
Answer questions promptly. Your designer is often juggling multiple projects, and gaps in communication are the single biggest reason a project timeline stretches out.
Send real measurements and real photos. This is the one homework assignment that matters most, and it's also the one people rush. A rough guess at room dimensions leads to a floor plan and furniture layout that doesn't actually fit. Which brings us to the next part.
How to Draw a Floor Plan for Your eDesign Project
You don't need drafting experience to do this well. You need a tape measure, a pencil, and about twenty minutes per room.
What you'll need
Tape measure
Grid paper or plain paper
Pencil
Sharpie (to go over your final lines so they're easy to read in a photo)
Steps
Label the room. At the top of your paper, write the room name and how you actually use it, not just what it's called on paper. “Living Room” is fine, but “Playroom / TV Room” tells your designer more.
Sketch the shape first. Before you measure anything, look at the room from a bird's-eye view and draw its general shape. You'll fill in exact numbers next.
Measure the overall room. Get length, width, and ceiling height, and mark those on your sketch.
Draw in doors, windows, and openings. Mark where they fall on each wall.
Measure every door, window, and opening. Measure from the outside edge of the trim, not the inside of the glass or the door itself. This is the step people get wrong most often, and it's why the finished layout sometimes doesn't match what you sent.
Add wall-to-wall measurements. Wall to window, the gap between two windows, floor to windowsill, windowsill to ceiling. The more of these you capture, the fewer follow-up questions you'll get.
Draw in anything fixed. Fireplaces, columns, radiators, built-ins, anything that isn't moving regardless of the design. Measure each one (length, width, height) and note it.
Mark outlets, switches, vents, and thermostats. These determine where furniture and lighting realistically can and can't go, so they matter more than people expect.
Photograph your sketch and the room itself, and send both. A photo of the actual space fills in anything a flat sketch can't show, like flooring, trim style, or natural light.
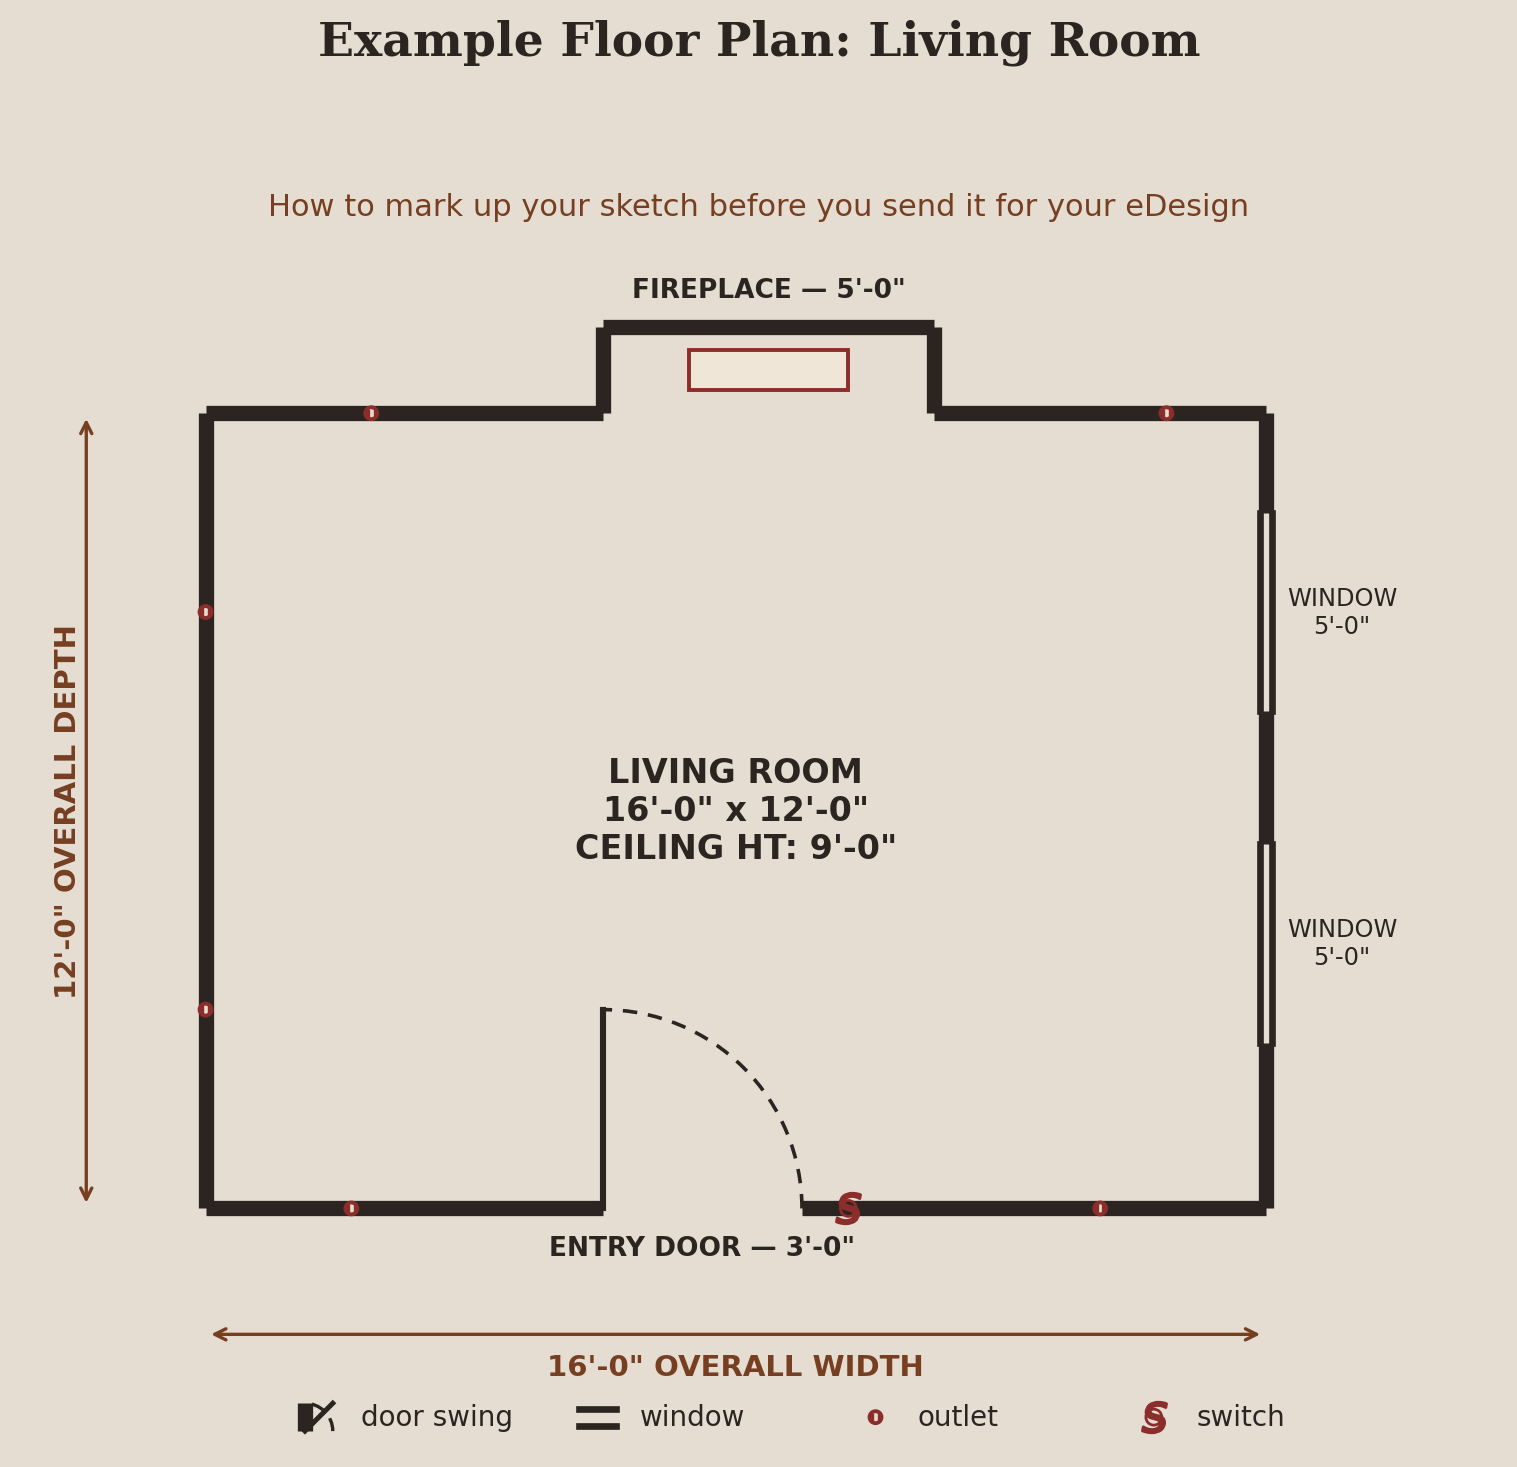
Example living room floor plan — entry door, windows, fireplace, and outlet placement.
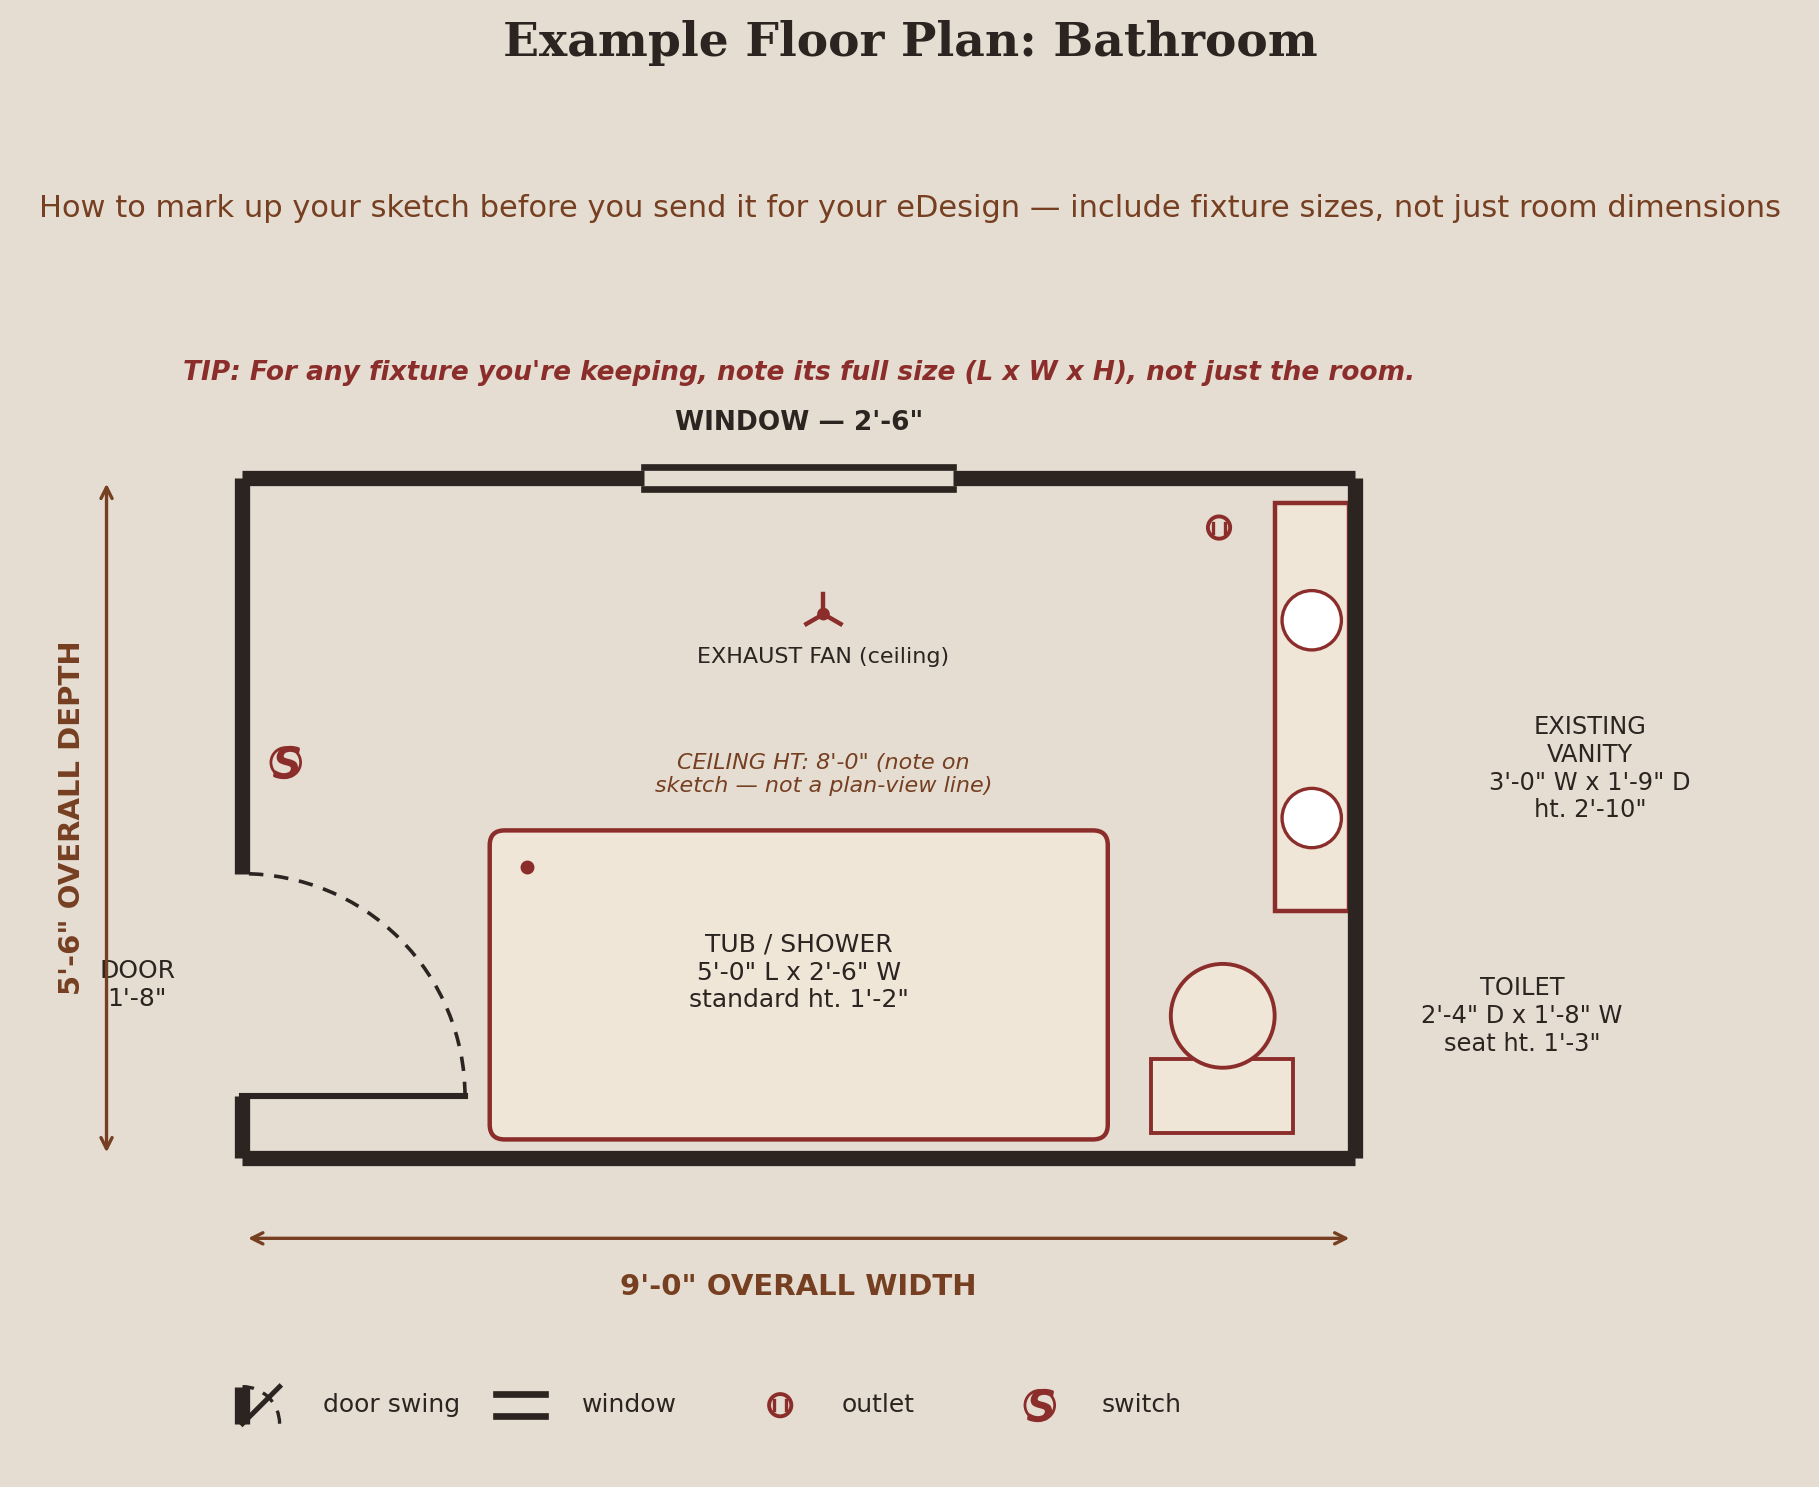
Example bathroom floor plan — door swing, window, toilet, existing vanity, and outlet placement, with fixture sizes called out.
Common Blueprint Symbols Worth Knowing
You don't have to memorize architectural drafting standards, but a few common symbols make your sketch much easier for a designer to read at a glance: a curved dashed line for a door swing, a double line break in the wall for a window, a small circle with two ticks for an outlet, and a circled “S” for a switch. Both example plans above use these.
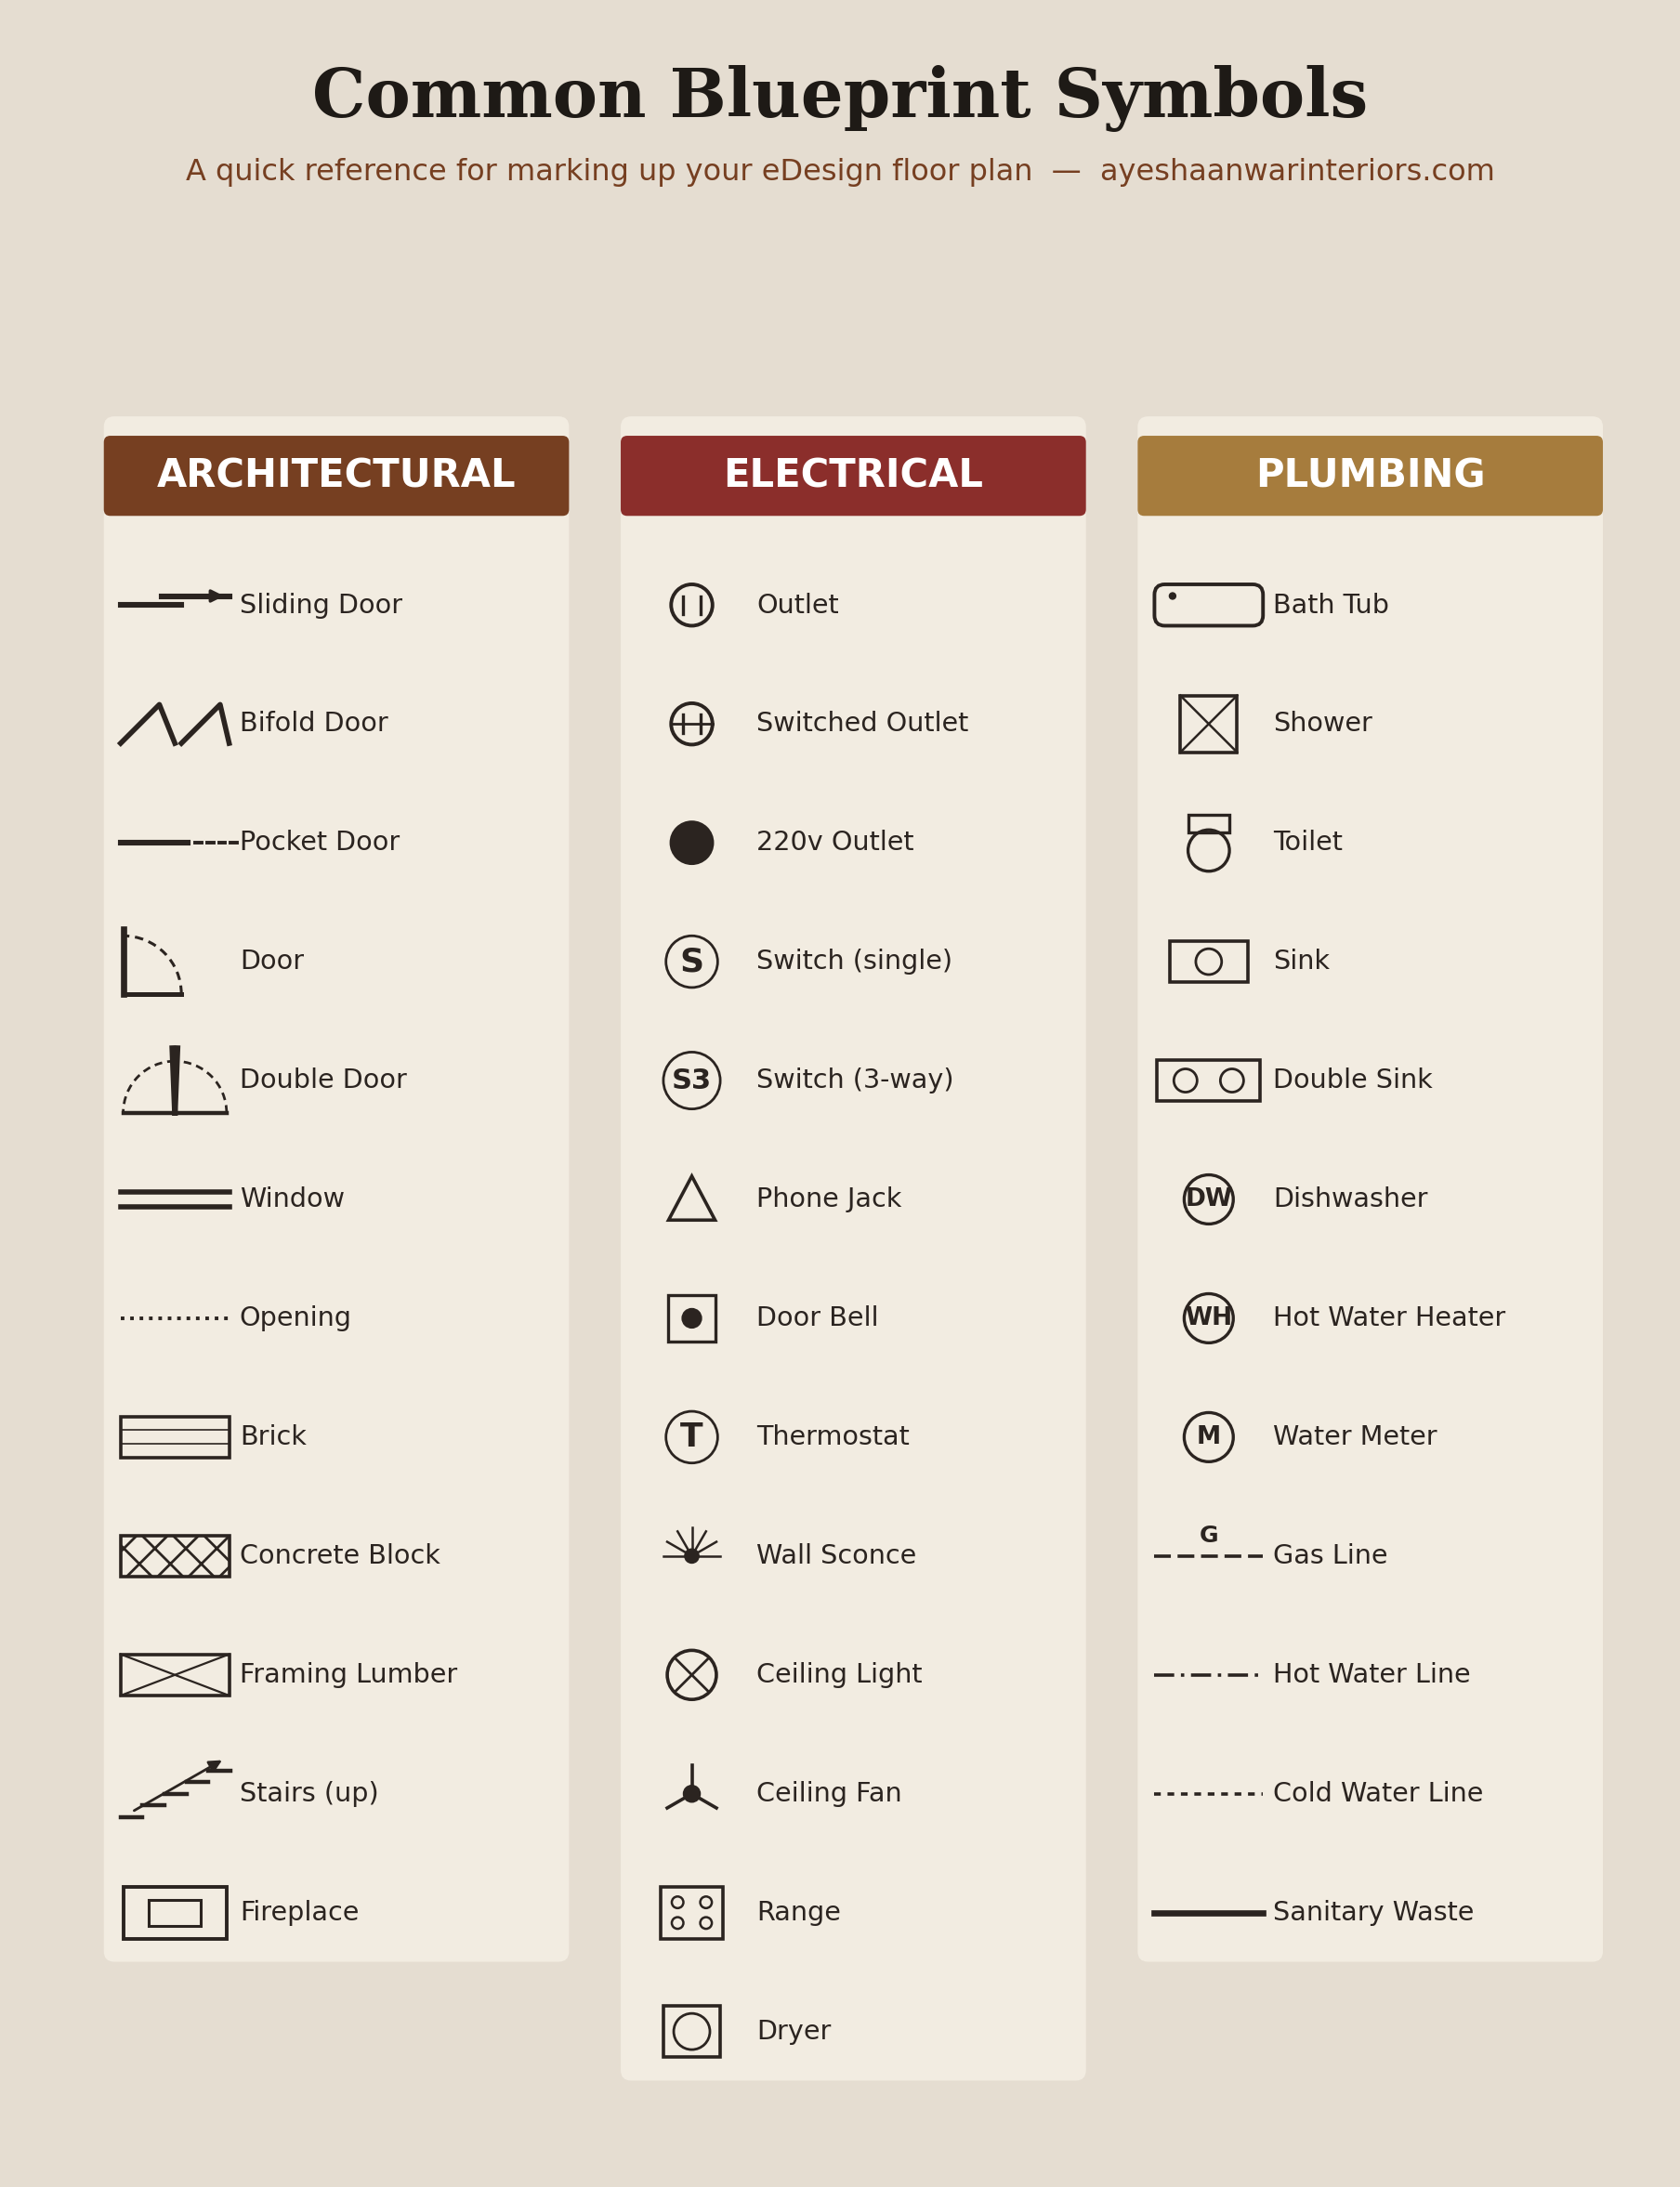
Common blueprint symbols for architectural, electrical, and plumbing elements, handy to keep nearby while you sketch.
Mistakes to Avoid
Measuring only the room and skipping doors, windows, and outlets is the most common one. So is guessing rather than measuring, especially on ceiling height. And rounding to the nearest foot instead of giving exact inches, small differences add up fast once furniture is involved.
Get this step right and everything downstream, your floor plan, your furniture layout, your final design, is built on solid ground instead of a guess.
Ready to get started? See eDesign packages
